
Hello and welcome!
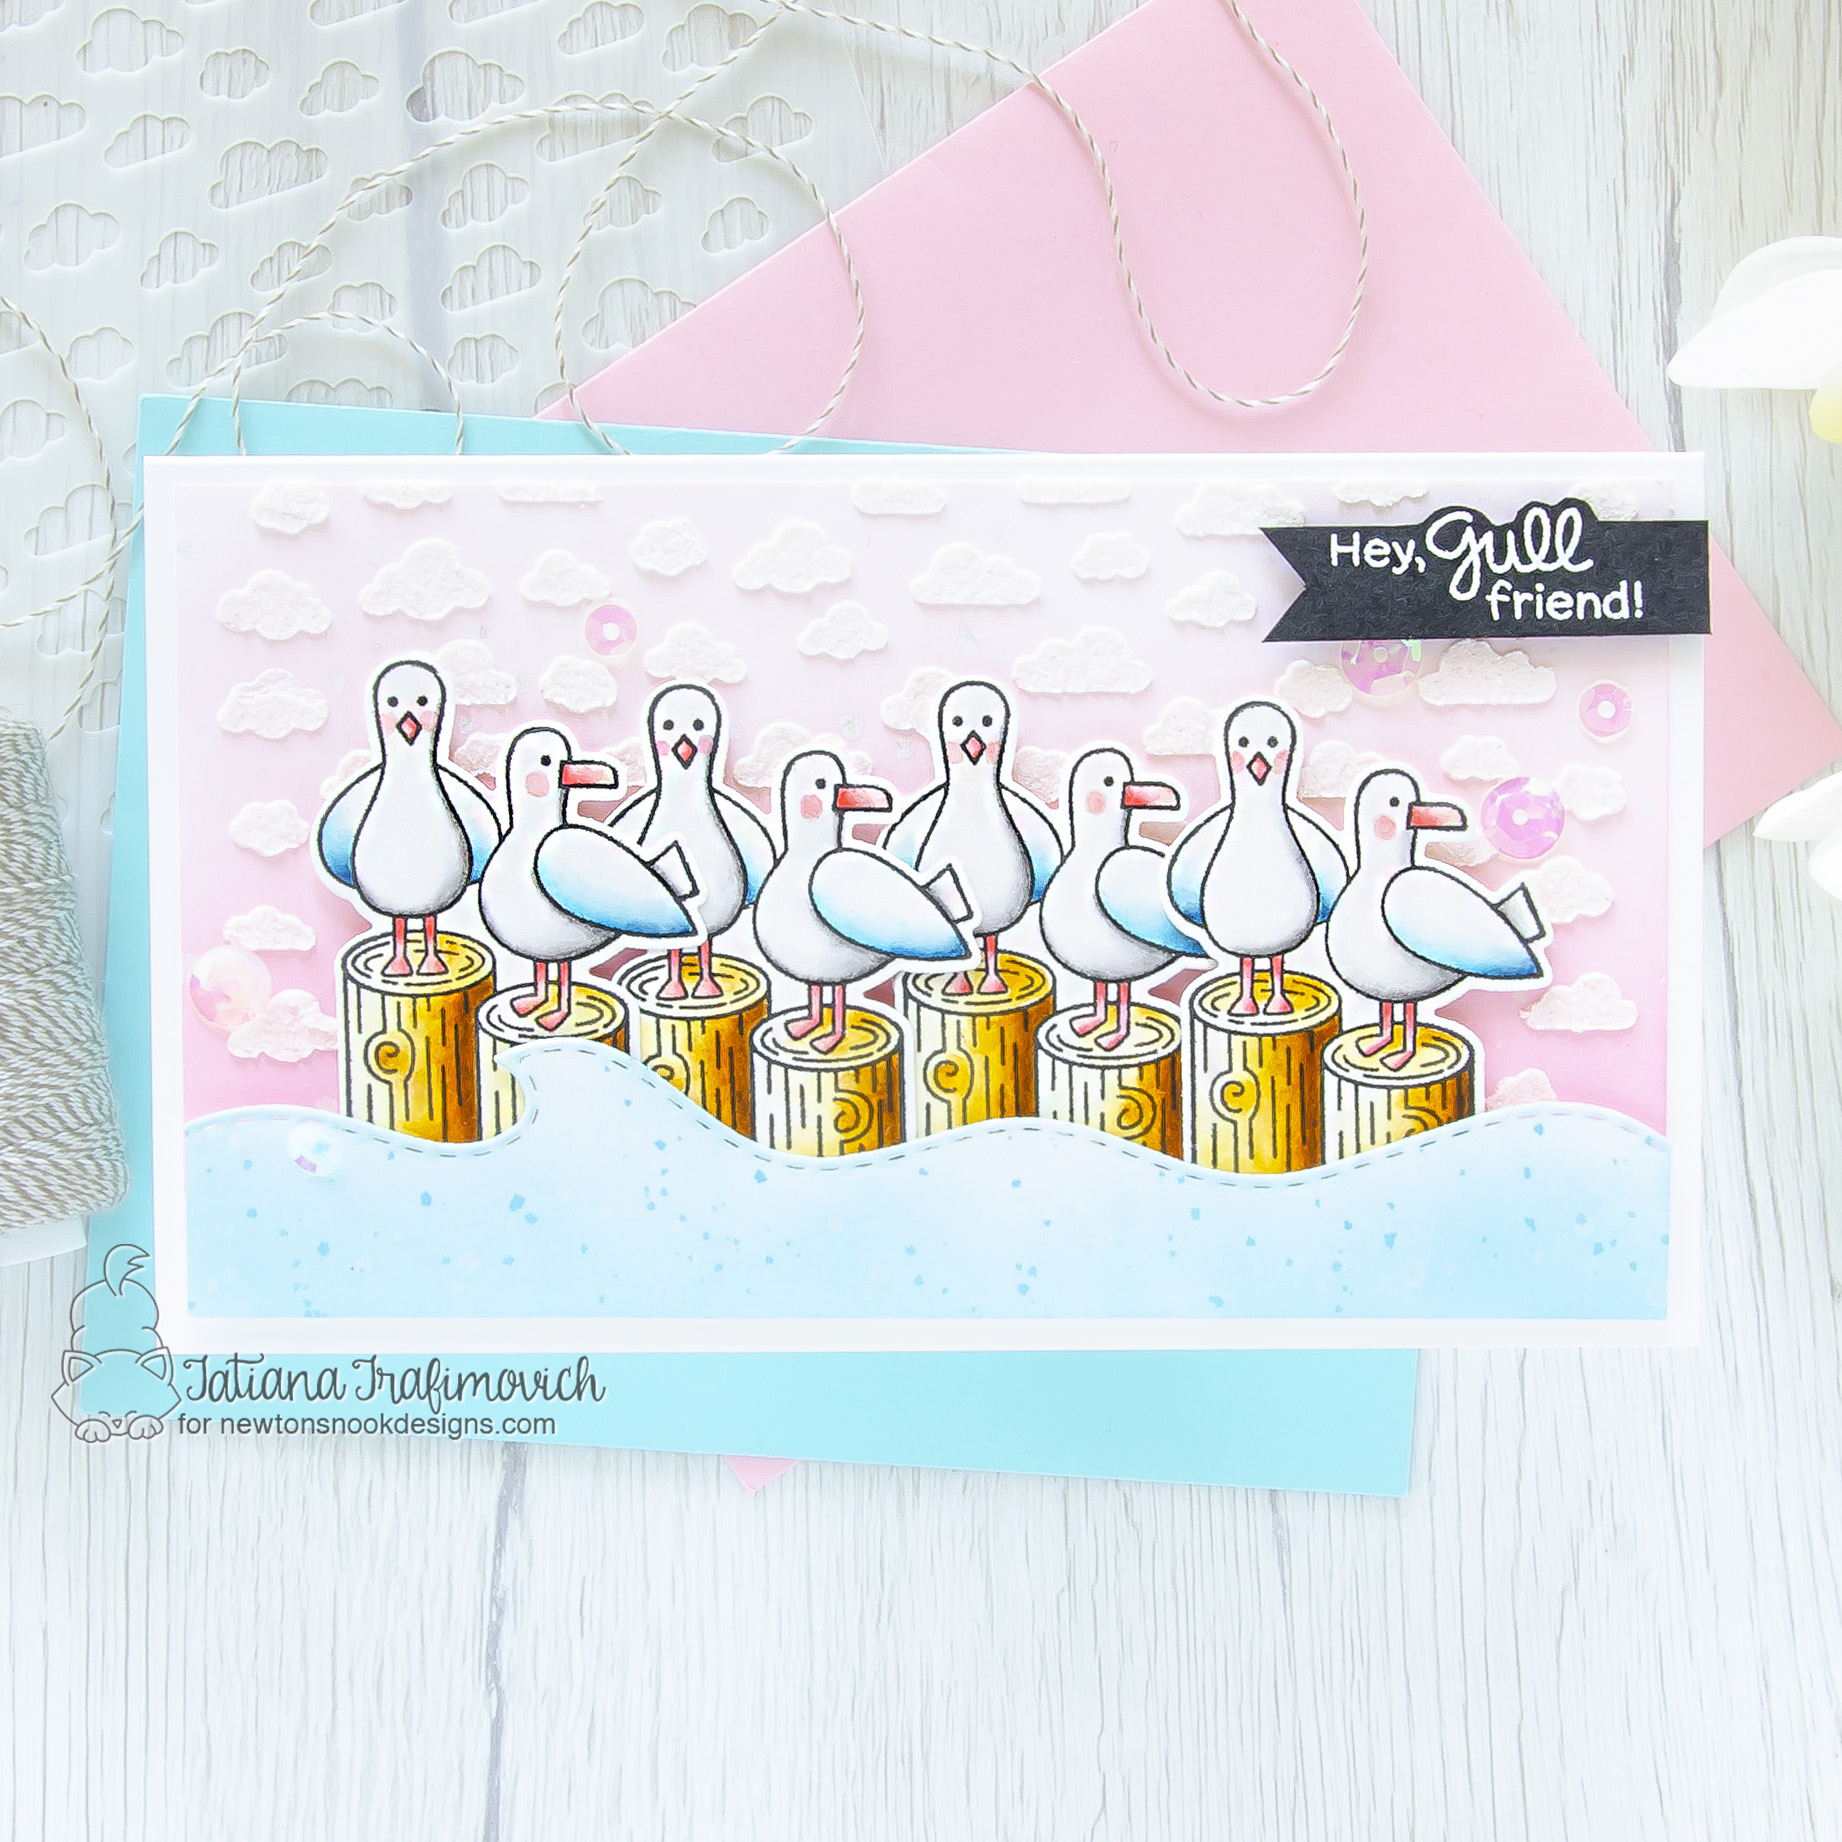
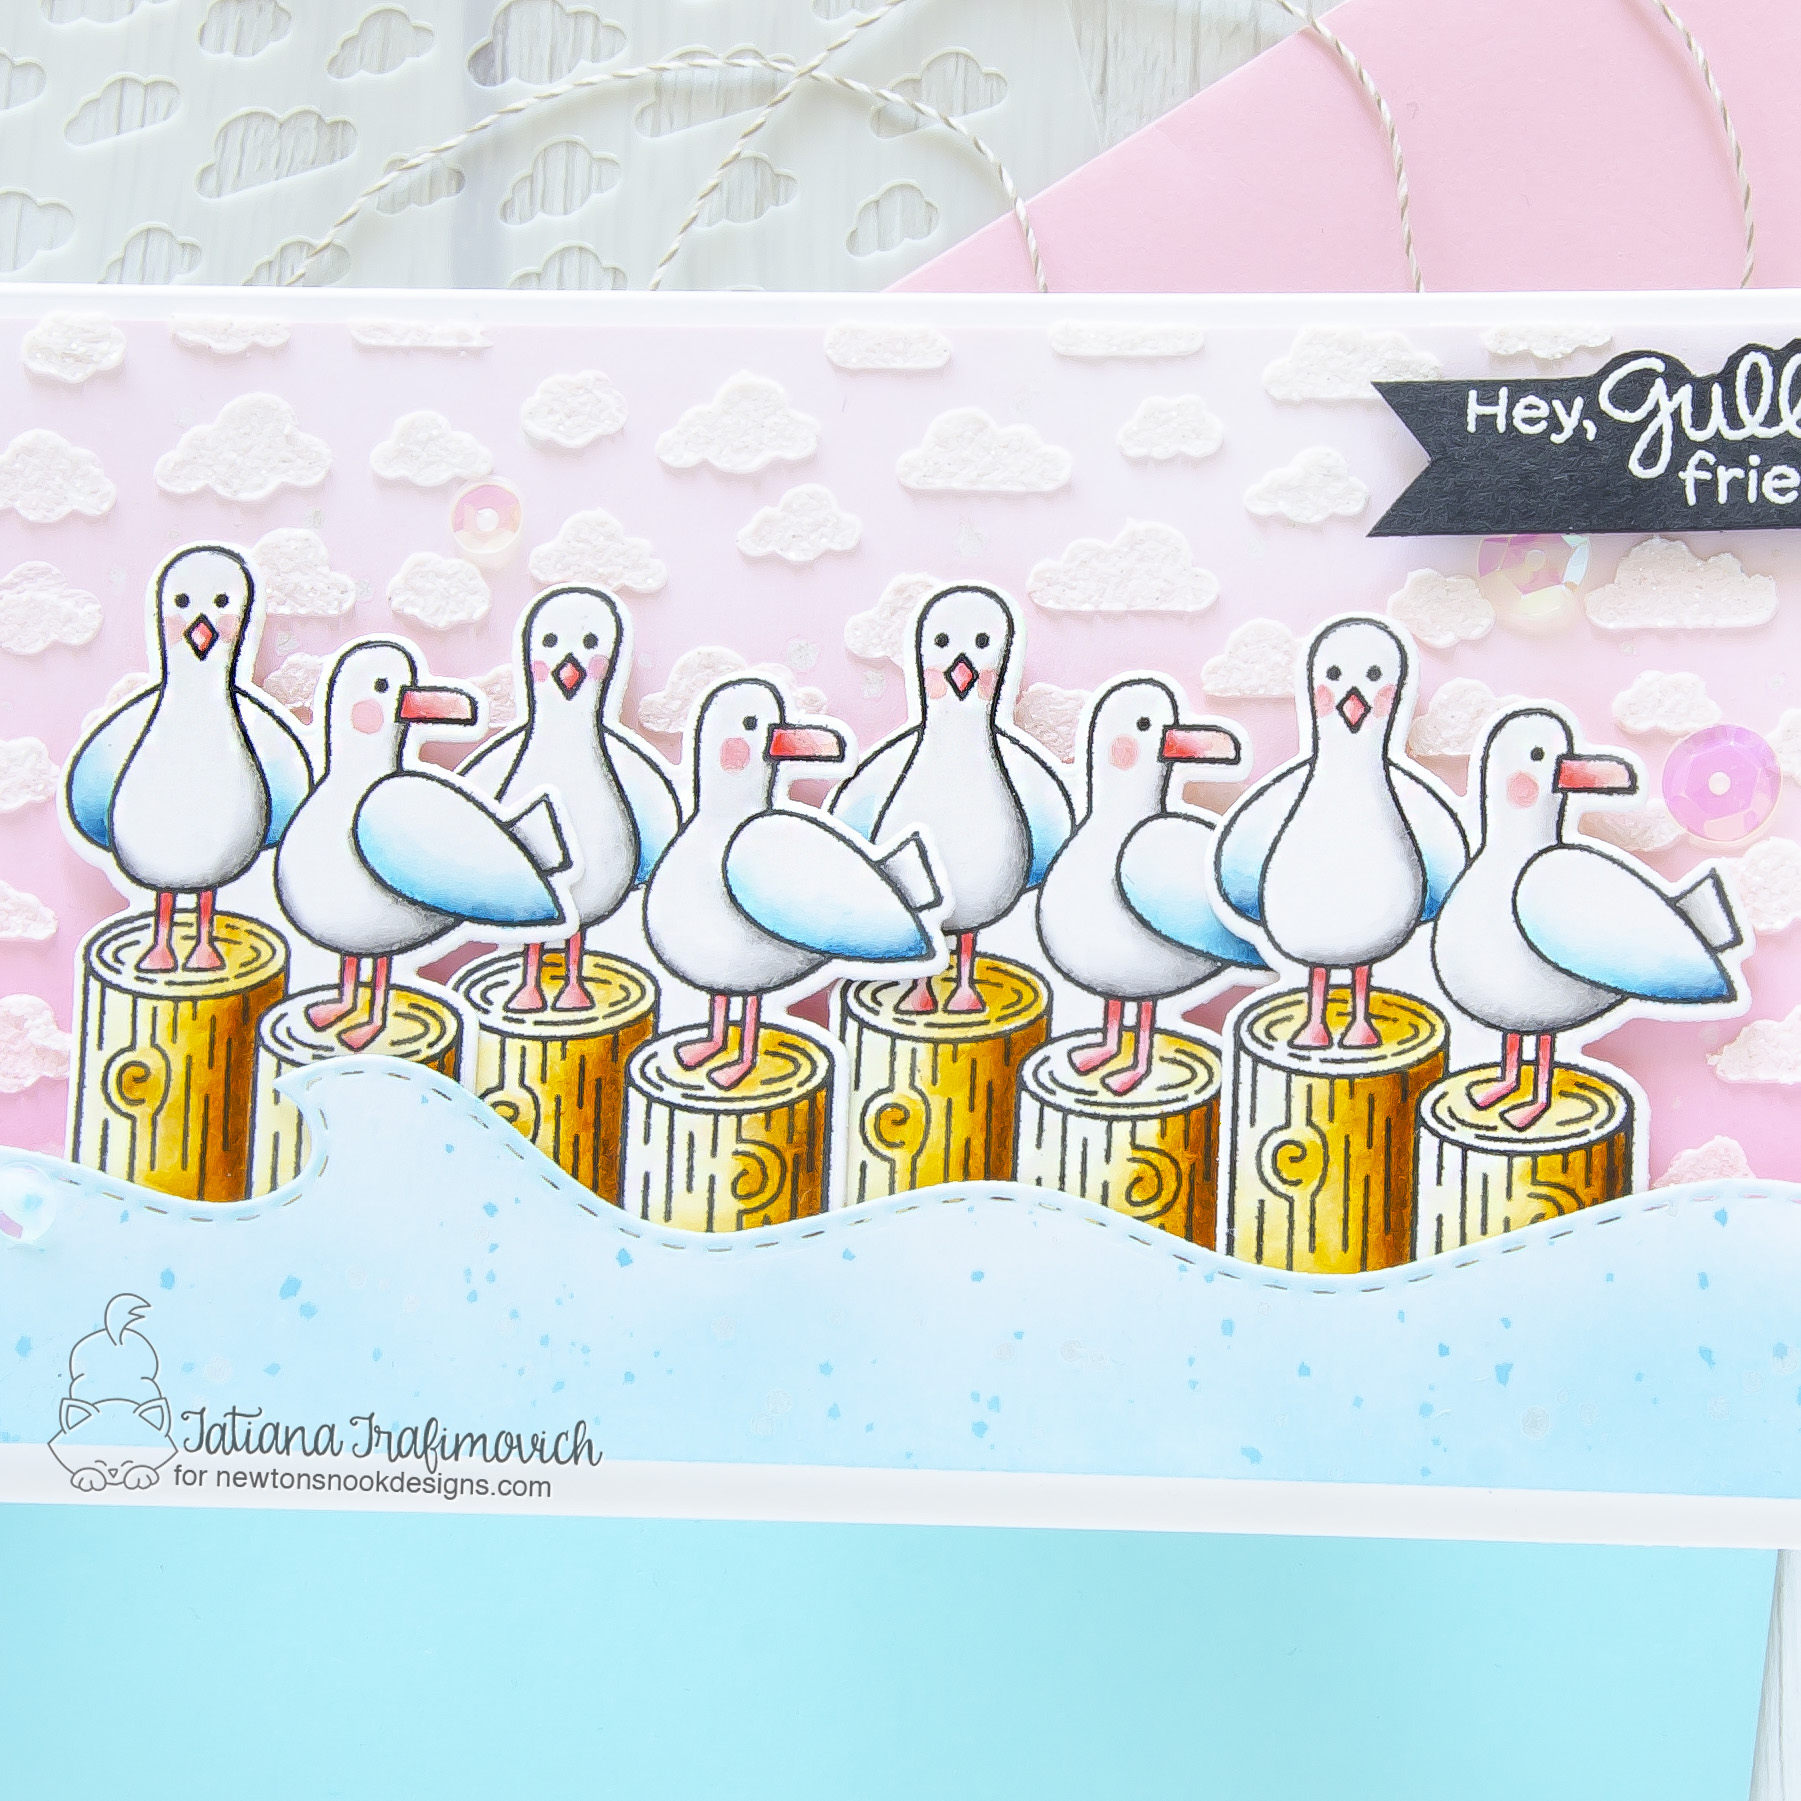
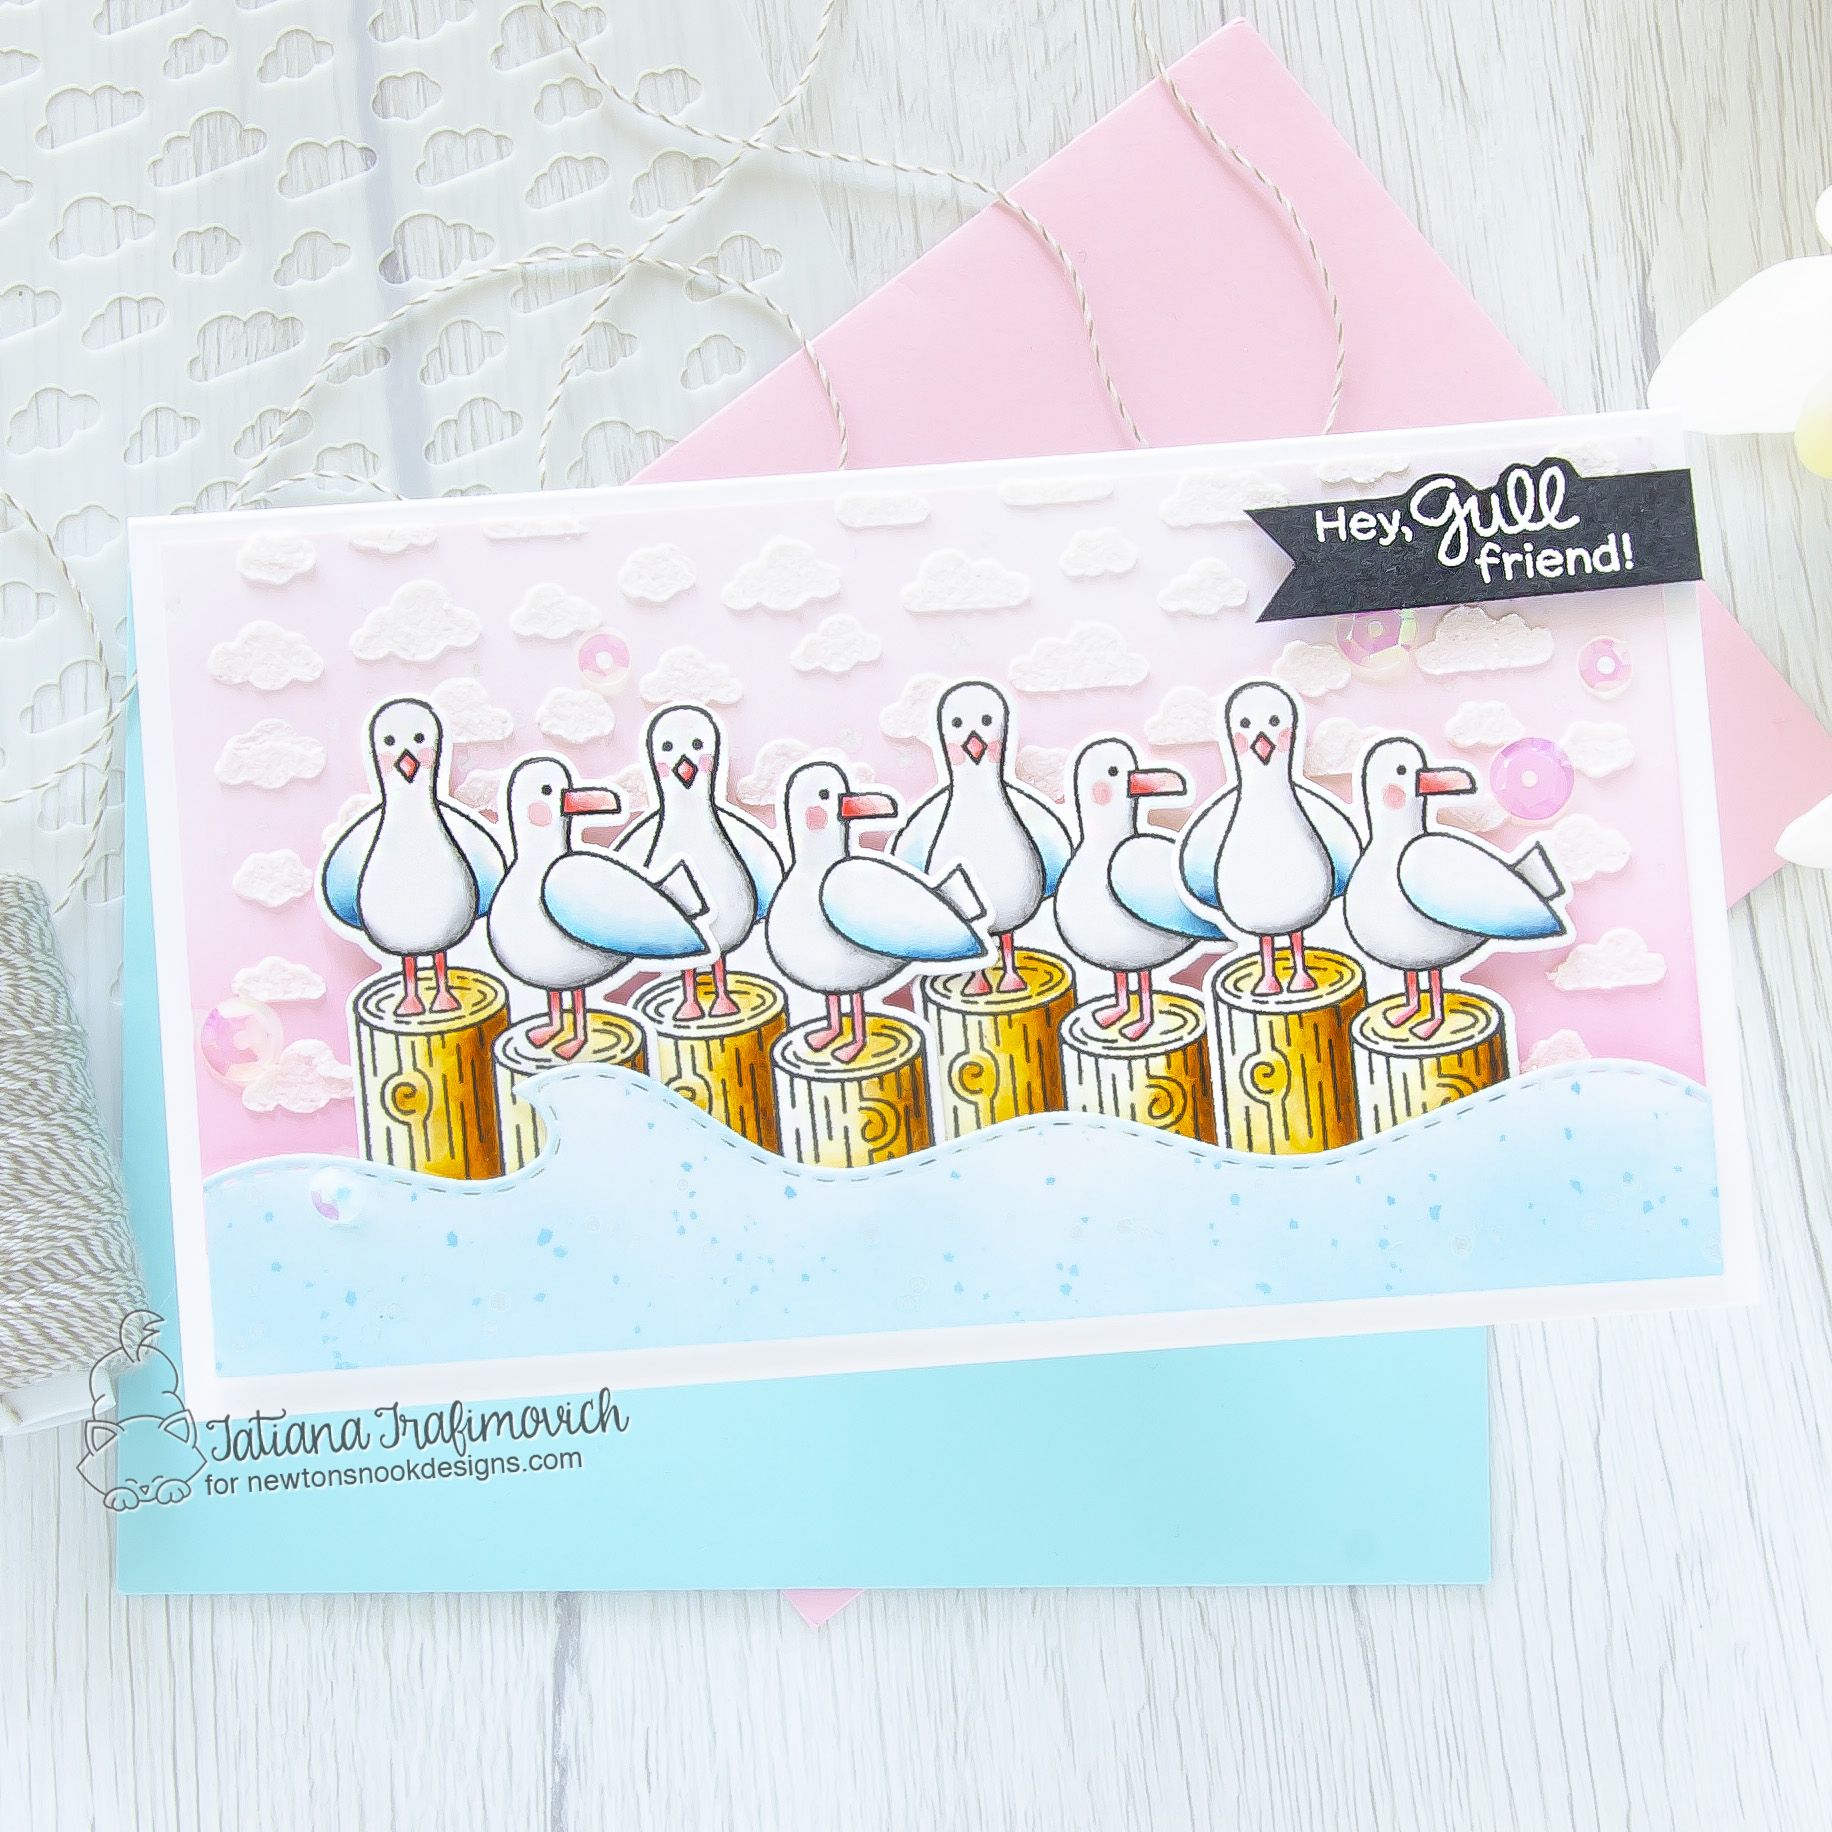
I’m so glad you’ve joined me today and even more excited to be on the Newton’s Nook Designs blog, sharing a cute small slimline card created from just one mini Gull Friends Stamp Set. I stamped and die cut one image multiple times to fill in the horizontal layout. Then I just kept the coloring simple and easy, limiting my color combo to light pink and blue.
Key Ingredients:
Step By Step Instructions:
- Die cut from Strathmore Bristol paper all the elements you need for your card, using the coordinating Gull Friends Die Set. I used on this project Sizzix Big Shot Die Cutting machine. Save the negative parts of the dies.
- Stamp the outline illustrations from Gull Friends Die Set with VersaFine Onyx Black pigment ink. Use the negative parts of the dies as a guide for a perfect alignment inside the stamping positioning tool.
- Color all the elements with water based markers, making the blending with a small water brush. I used:
- TOMBOW DUAL BRUSH MARKERS
- 526; 977
- ZIG CLEAN COLOR REAL BRUSH MARKERS
- n.21 Light Carmine
- n.28 Pale Pink
- n.36 Light Blue
- n.61 Light Brown
- n.94 Gray Brown
- Trim and score a small slimline card base (6″ x 3 1/2″) from Neenah Solar White paper.
- Trim a slightly smaller rectangle from the same Neenah Solar White paper and split it with wavy die from Sea Borders Die Set.
- Ink the wave with Tumbled Glass Distress Oxide, using a blending brush for a soft and smooth result.
- Flick some tiny droplets of a clear shimmer spray and splatter some Mermaid Lagoon Oxide ink diluted with a small amount of water on the wave background to add more interest.
- Ink the sky portion with Spun Sugar Distress Oxide and Kitsch Flamingo Distress inks.
- Flick again some tiny droplets of a clear shimmer spray all across.
- Mix a white embossing paste with Gina K White Glitz Glitter gel on a slick non sticky surface like Ranger Craft Sheet.
- Apply the mixed pastes through Petite Clouds Stencil on the pink sky. Don’t forget to tape well the stencil with a removable tape to the paper to prevent any movement. Let the paste air dry.
- Heat emboss in white onto black the sentiment.
- Arrange and glue in place all the elements on the card front, by popping some of them on a foam tape for a fun dimensional look.
- Finish with a couple of clear sparkling sequins adhered with Distress Collage Medium Matte.
That’s all for today! Hope you like this cute and fun card! Thanks so much for stopping by and have a fabulous day!
Hugs,
Tatiana