
Hello and welcome! Thank so much for joining me today! Throughout this week the Newton’s Nook Designs Design Team and I are featuring some brand new holiday products! Please, join the Blog Hop & Giveaway by clicking HERE for a chance to win a $25 store credit for Newton’s Nook Designs online shop and keep reading this post for more holiday inspiration!

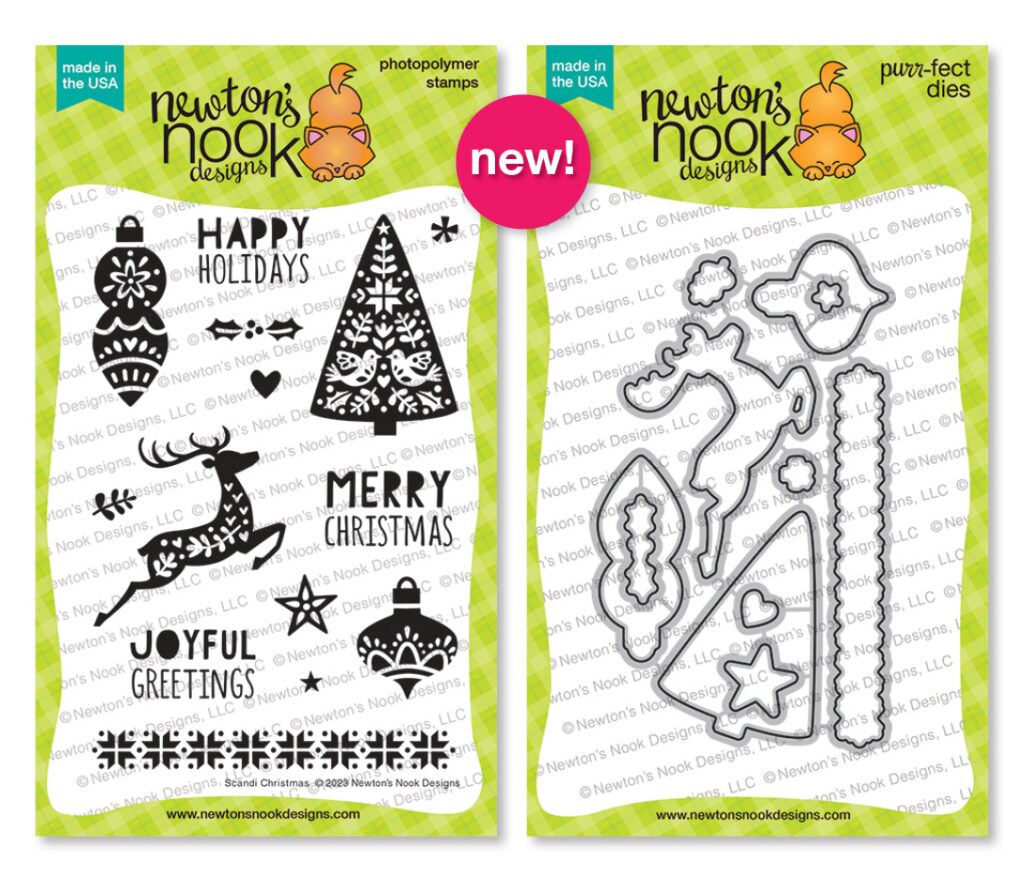
If you are not a fun of whimsical illustrations and coloring, this wonderful brand new Scandi Christmas Stamp Set might be your choice for the holiday projects! Please note that, in case you’re interested, there’s the coordinating Scandi Christmas Die Set too!
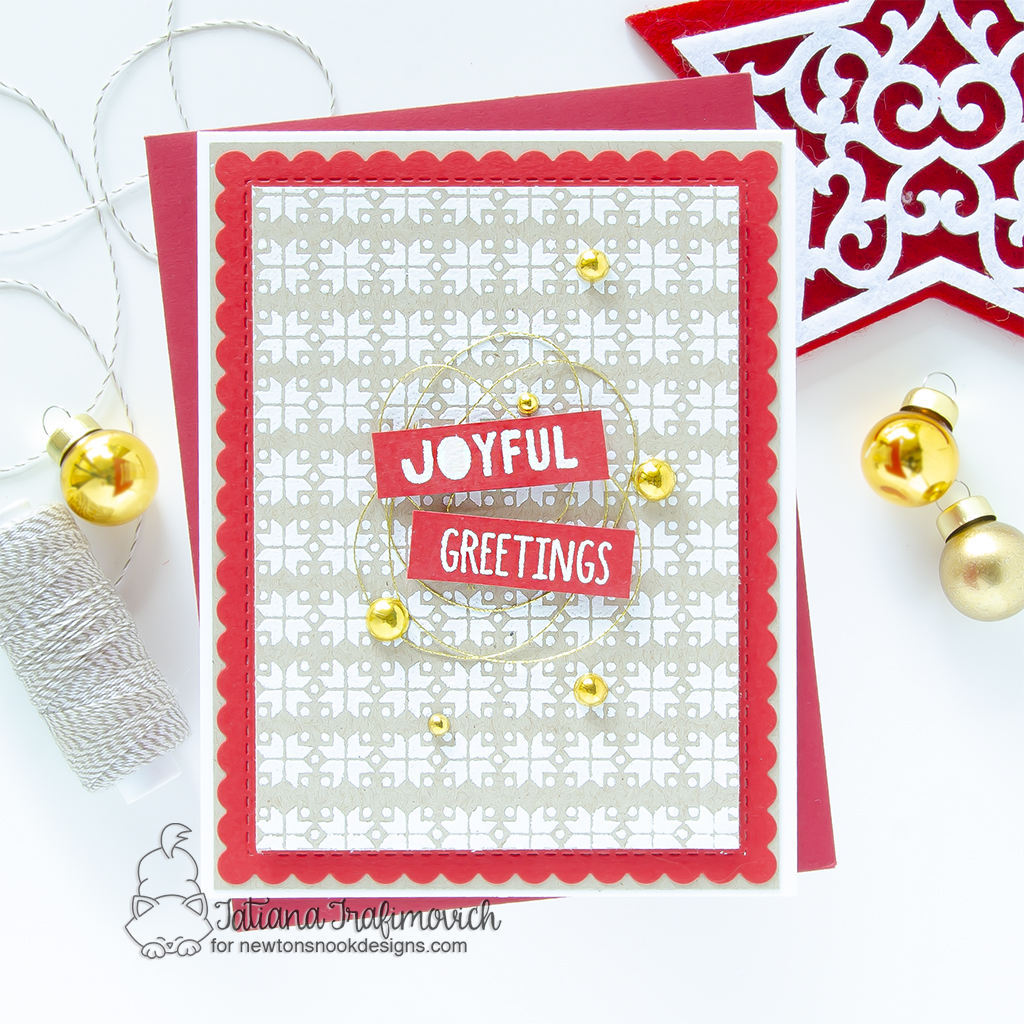
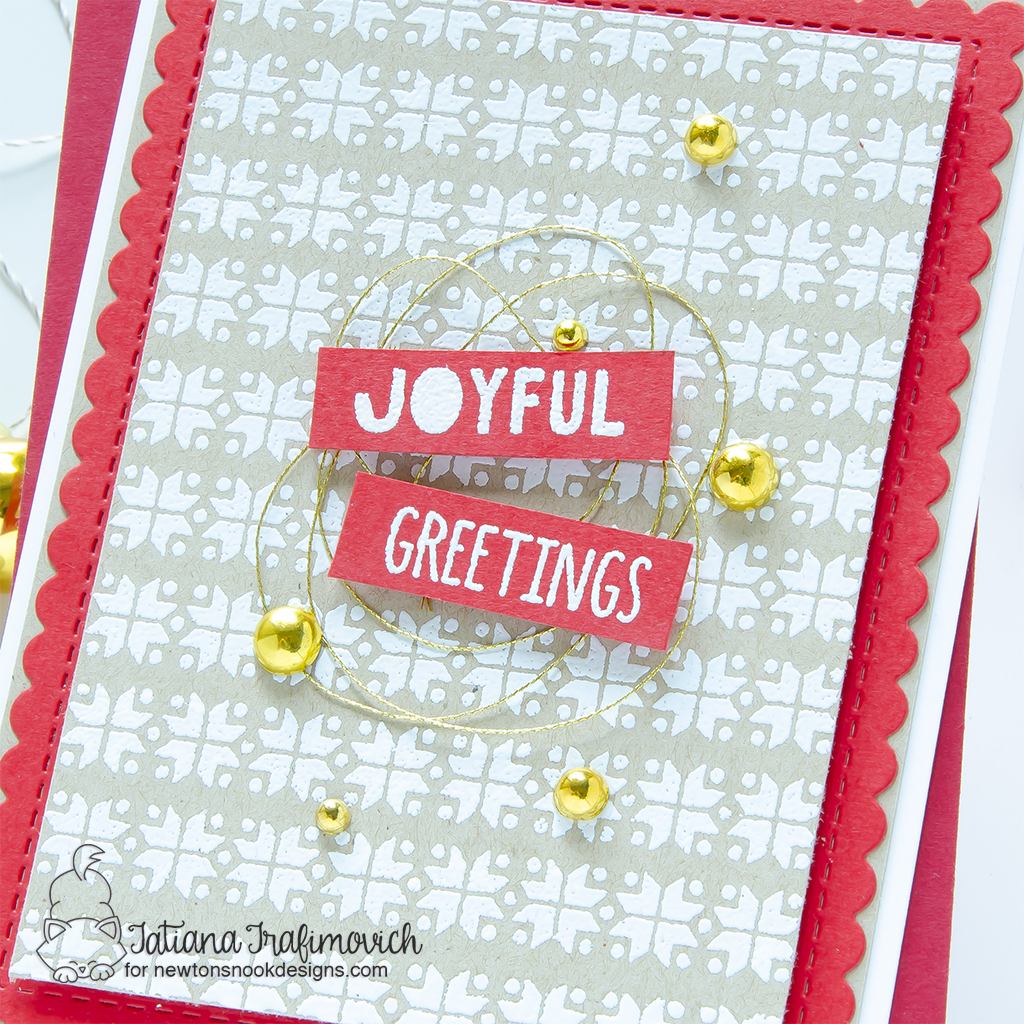
On my card I created a classical holiday pattern by repeatedly heat embossing in white on kraft the ornamental line stamp! Then I carefully split the sentiment with my scissors and heat embossed it too, but this time on red to bring a pop of bright Christmas shade in the center of the card base.
Key Ingredients:
Step By Step Instructions:
- Trim and score an extended A2 size card base (5 1/2″ x 4 1/4″) from Neenah Solar White paper. I used Tim Holtz Maxi Guillotine Trimmer and Mini Score Board.
- Trim a slightly smaller kraft panel. I used my favorite kraft paper – Neenah Desert Storm.
- Die cut a red scalloped rectangle from red, using Frames & Flags Die Set and Spellbinders Platinum 6 Die Cutting Machine or Sizzix Big Shot Die Cutting Machine. I used The Stamp Market Cherry Kisses cardstock.
- Trim another kraft rectangle from the same Neenah Desert Storm cardstock slightly smaller than your red scalloped frame.
- Generously cover the small kraft piece with Powder Tool Applicator to prevent the embossing powder to stick where you don’t want it!
- Repeatedly heat emboss in white the ornamental line from Scandi Christmas Stamp Set with VersaMark clear sticky ink and Hero Arts White Embossing Powder.
- Carefully split in two the sentiment from Scandi Christmas Stamp Set with the sharp small scissors.
- Heat emboss in white on red the two parts of the sentiment, using again VersaMark clear sticky ink and Hero Arts White Embossing Powder. Don’t forget to prep the paper with a Powder Tool Applicator to prevent the embossing powder to stick where you don’t want it!
- Arrange and glue in place all the elements on the card front by popping some of them on a foam tape for a bit of dimension.
- Add a couple of finish touches with a gold thread and some golden baubles.

That’s all for today! Hope you like today’s classic Christmas card! Thanks so much for stopping by and have a fabulous day!
Hugs,
Tatiana